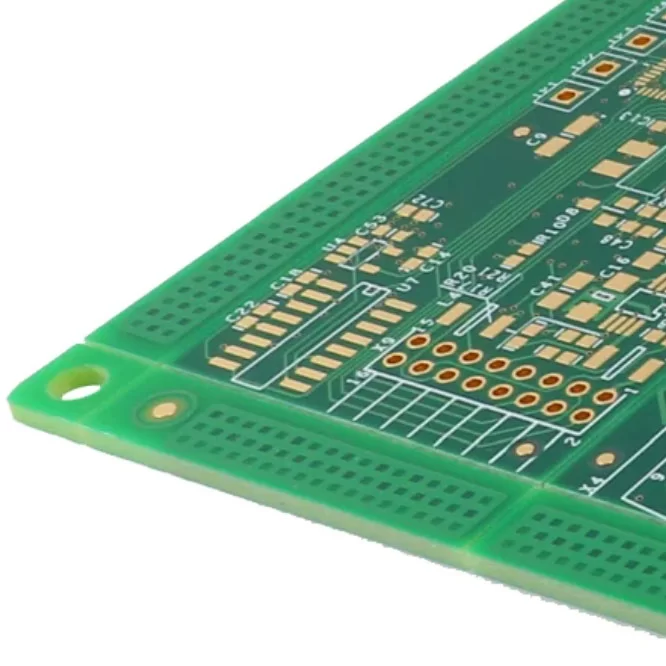
Printed circuit boards (PCBs) are exposed to various contaminants throughout manufacturing, assembly, transportation, and storage. Dust, fingerprints, soldering residues, oils, and moisture can accumulate on the board surface and around electronic components. If these substances are not properly managed, they may interfere with electrical insulation, accelerate corrosion, or affect the stability of electronic devices.
As PCB designs become more compact and component spacing decreases, maintaining an appropriate level of cleanliness is increasingly important. Selecting a suitable cleaning method helps remove unwanted residues while protecting sensitive components and circuit structures. This guide explains how to clean a PCB board, compares common cleaning techniques, and outlines the factors to consider when choosing PCB cleaning agents for different applications.

What are the Benefits of Cleaning PCBs?
PCB cleanliness directly affects manufacturing quality, electrical performance, and long-term product reliability. The appropriate cleaning procedure removes unwanted substances that could interfere with circuit operation or create problems during subsequent assembly and use.
Corrosion Protection. Certain ionic contaminants and chemical residues can react with moisture and contribute to corrosion on copper traces, solder joints, and component terminals. Removing these substances helps protect conductive surfaces and reduces the risk of deterioration during storage and operation.
Failure Prevention. Contaminants accumulated between closely spaced conductors may reduce insulation resistance or contribute to leakage currents. Under suitable conditions, conductive residues can also promote unintended electrical paths between neighboring connections. Understanding how to clean a PCB board correctly helps minimize these risks and supports more stable circuit operation.
Improved Reliability. Residual flux, salts, and other contaminants can contribute to electrochemical migration when moisture and an electrical potential are present. Appropriate cleaning, rinsing, and drying procedures help reduce these contamination-related risks. This is particularly important for electronic assemblies intended for demanding operating environments or extended service life.
Better Cosmetics. A clean PCB presents a more professional appearance and makes subsequent inspection easier. Removing visible stains, dust, and unwanted residues also helps quality-control personnel identify defects that might otherwise be hidden beneath surface contamination. Cleanliness is especially important before applying conformal coatings, potting compounds, or other protective materials.
What are the Different PCB Cleaning Methods?
The best PCB cleaning method depends on the type of contamination, board construction, component sensitivity, production volume, and cleanliness requirements. Some applications can be handled with simple manual cleaning, while more complex assemblies may require specialized equipment and controlled cleaning processes.
1. Manual Cleaning
Manual PCB cleaning is suitable for prototype boards, maintenance work, localized contamination, and small production quantities. It allows technicians to focus on specific areas without processing the entire assembly through an automated cleaning system. However, cleaning quality depends on the operator's technique and the compatibility of the selected materials.
If you need to understand how to clean a PCB board by hand, follow these steps:
Disconnect the power supply. Turn off the equipment, disconnect external power sources, and remove batteries where applicable. Confirm that stored electrical energy has been safely discharged before handling the board.
Examine the board. Inspect the PCB under adequate lighting to identify dust, flux residues, fingerprints, corrosion, or other visible contamination. Magnification can help reveal deposits around fine-pitch components and tightly spaced solder joints.
Remove loose particles. Use an ESD-safe brush or another suitable cleaning tool to remove dust and debris without scratching the solder mask or damaging delicate components. If compressed air is used, ensure that it is clean, dry, and supplied at a pressure appropriate for the assembly.
Apply a compatible cleaning agent. Use electronics-grade isopropyl alcohol (IPA) or another manufacturer-approved cleaner when suitable for the contamination and board materials. Gently work on affected areas with a lint-free swab or wipe. Avoid excessive liquid around components that may trap cleaning agents.
Allow sufficient drying time. Follow the cleaning agent manufacturer's instructions to ensure that the solvent has evaporated or that any remaining moisture has been removed. Do not power the PCB while cleaning liquid remains on the board or inside components.
Inspect the finished board. Examine the cleaned areas again for remaining residues, discoloration, or signs of damage. Repeat the process only when necessary and when the materials and components can tolerate further cleaning.

2. Ultrasonic Cleaning
Ultrasonic cleaning uses high-frequency sound waves to generate microscopic bubbles in a cleaning liquid. Their formation and collapse help dislodge contaminants from accessible surfaces and difficult-to-reach areas. This technique can be useful for batch processing, but it is not appropriate for every PCB assembly.
Before using this method, verify that the components, connectors, oscillators, sensors, and other devices on the board are compatible with ultrasonic exposure. Cavitation and mechanical vibration can damage certain components, and trapped liquid may remain beneath packages or inside connectors.
Ultrasonic Cleaning for PCB
Prepare the PCB. Disconnect all power sources and remove batteries or detachable accessories where appropriate. Confirm that the complete assembly is suitable for immersion and ultrasonic cleaning.
Load the boards correctly. Place the PCBs in a compatible basket or fixture that keeps them separated and allows cleaning liquid to reach the required surfaces. Avoid direct contact between boards that could cause mechanical damage.
Configure the cleaning parameters. Select the cleaning solution, temperature, frequency, and cycle duration according to the equipment manufacturer's instructions and the assembly's requirements. Do not assume that higher temperatures or longer cycles will produce better results.
Run the cleaning cycle. Operate the ultrasonic cleaner under controlled conditions. Monitor the process to ensure that the boards remain correctly positioned and that the selected cycle is suitable for the target contamination.
Rinse the PCB. When the cleaning chemistry requires rinsing, use an appropriate rinse medium, such as deionized water for compatible aqueous processes. Follow the chemical supplier's recommendations to prevent residual cleaning agents from remaining on the board.
Dry and inspect the assembly. Remove moisture from exposed surfaces and ensure that liquid trapped beneath components or inside connectors has been eliminated using an approved drying process. Inspect the board for remaining contamination and signs of component damage before further testing.
3. Aqueous and Semi-Aqueous Cleaning
Aqueous and semi-aqueous cleaning processes are commonly used in electronics manufacturing when the cleaning chemistry is compatible with the residues and PCB assembly.
Aqueous cleaning generally relies on water-based formulations containing surfactants or other additives to remove flux, oils, and particulate contamination. Semi-aqueous systems combine organic cleaning ingredients with water or use related solvent-based formulations, depending on the product design. These methods can support repeatable cleaning in batch or automated production environments.
Prepare the PCB. Disconnect the power supply and check whether the board, components, connectors, and labels are compatible with the selected cleaning chemistry. Remove detachable parts that should not be exposed to the process.
Apply the cleaning solution. Process the assembly using the specified aqueous or semi-aqueous cleaner. Depending on the equipment, the solution may be applied through immersion, controlled spraying, or an automated washing system.
Rinse away residues. Follow the cleaner manufacturer's instructions regarding rinsing requirements. For water-based processes, suitable rinse water is important because residual chemicals or dissolved contaminants can remain on the board after washing.
Dry the PCB thoroughly. Use a validated drying process that removes moisture from component gaps, connector cavities, and other areas where liquid may accumulate. Confirm that the assembly is dry before electrical testing or subsequent manufacturing operations.
4. Vapour Degreasing
Vapour degreasing is a specialized cleaning technique that uses vaporized cleaning solvents to remove compatible contaminants from component and PCB surfaces. In suitable systems, solvent vapor condenses on cooler surfaces, helping dissolve oils, grease, and other targeted residues.
This method requires equipment designed for the selected solvent and compliance with applicable environmental, occupational safety, and chemical-handling requirements. Solvent compatibility must be confirmed before processing the assembly.
Load the PCB. Place the board in an appropriate basket or fixture that supports it securely and allows the cleaning medium to contact the intended surfaces.
Expose the assembly to solvent vapor. Position the PCB in the designated vapor zone according to the equipment manufacturer's operating procedure. Condensing solvent can help dissolve compatible contamination on exposed surfaces.
Complete the required rinsing stage. Where the system design calls for a separate rinse or clean-solvent stage, follow the validated process to remove dissolved contaminants and prevent redeposition.
Cool and dry the PCB. Allow the board to pass through the prescribed cooling and solvent-recovery stages. Do not remove or handle the assembly outside the equipment's designated safe operating procedure.
Verify cleanliness. Inspect the PCB using an appropriate method for the contamination and cleanliness requirements. Visual inspection may identify visible residues, while specialized testing may be necessary to evaluate ionic contamination or other invisible residues. UV inspection is useful only when the relevant substances have detectable fluorescence; it does not establish overall PCB cleanliness by itself.
What are the Different PCB Cleaning Agents?
PCB contamination varies in composition, adhesion, and location. A cleaning agent that works well for soldering flux may be ineffective against grease, while an unsuitable chemical can damage plastic housings, component markings, solder masks, or protective coatings.
The correct choice depends on the residue type, board materials, cleaning equipment, and the required cleanliness level.
· Solvent-Based. Solvent-based cleaners are designed to dissolve specific organic contaminants, including certain flux residues, oils, and grease. Electronics-grade isopropyl alcohol is commonly used for localized cleaning when material compatibility has been confirmed. Other formulated solvents may be necessary for particular flux chemistries. Acetone should not be treated as a universal PCB cleaner because it can damage plastics, coatings, adhesives, and markings. Follow the cleaner's safety data sheet, provide appropriate ventilation, and keep flammable solvents away from ignition sources.
· Aqueous or Water-Based. Water-based PCB cleaners typically use deionized water together with surfactants, saponifiers, or other additives formulated to remove particular contaminants. They are frequently used for compatible flux residues and other water-removable substances in manufacturing environments. Proper rinsing and drying are essential because residual chemicals and moisture can affect insulation resistance or promote corrosion. Ordinary tap water is generally unsuitable for controlled final rinsing when dissolved minerals could leave deposits on the assembly.
· Ultrasonic Cleaning Solutions. Ultrasonic cleaning can be performed with compatible aqueous formulations or specially designed solvent-based products, depending on the equipment and contamination. The cleaning solution should be selected according to the target residue, component compatibility, and required process conditions. Some formulations are designed to remove rosin-based flux, while others target oils, grease, or specific assembly contaminants. Always verify that both the cleaning chemistry and ultrasonic exposure are appropriate for the complete PCB assembly. The use of ultrasonic equipment alone does not guarantee that the board will be free from contamination.
Conclusion
PCB cleaning is an important part of maintaining electronic assembly quality, electrical insulation, and long-term product reliability. Dust, oils, flux residues, moisture, and ionic contamination can affect circuit performance when they are not properly controlled. Understanding how to clean a PCB board helps technicians select suitable cleaning methods, apply compatible chemicals, and establish effective rinsing, drying, and inspection procedures.
Manual cleaning is useful for localized maintenance and small-scale work, while ultrasonic, aqueous, semi-aqueous, and vapour-based processes can support more specialized applications. Each method requires careful consideration of component compatibility, contamination type, process parameters, and workplace safety.
A reliable PCB cleaning process should be validated against the actual assembly requirements rather than judged by appearance alone. Combining appropriate cleaning procedures with cleanliness verification helps reduce contamination-related failures, protect sensitive components, and support consistent manufacturing quality.